Due to a cranky left wrist I've taken a forced vacation from wheel throwing and continue to hand-build. The turtles need company in the kiln. However, hand building is not completely undemanding on the wrists. There's wedging. I googled "wedging clay" just for the heck of it and came up with something I've never seen or heard of before- the cut and slap wedging method. I thought it looked tedious, but it would eliminate a lot of the wrist motion. Further on down in the article is the method I usually use- the cone shape one.
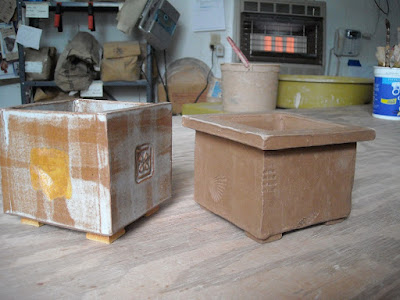
I made some small planters, intended for succulents. This went much better than it has in the past now that know about using drywall to partially dry the flat slab parts for the planters. Translation for non-clay readers: I roll out slabs of clay and, using templates, cut out the planter pieces. These pieces are sandwiched between two drywall boards. I had previously cut the drywall to convenient rectangle or square sizes. And if you are a clay person but haven't tried this, make sure you tape the edges on that drywall- you don't want any loose stuff getting in your clay. I used painter's tape just because it was handy. I'm sure making tape is fine too. After a few hours the drywall evenly absorbs enough moisture from the clay to make it easy to go on to the construction phase without distorting the shapes.
The planter on the left is one I did pre drywall method. Sometimes I keep things around even though I don't like them just to have time to decide what could have been done better. One side is a little warped and the shape seems a little unfinished and awkward. I shortened it, gave it the ledge to give a little finish, and made the feet smaller. See my necessities in the background- Wall heater and c.d.player.
Osage Orange tree/a.k.a. hedgeapple tree. This reminds me of the trees in "The Forest of No Return" from Babes in Toyland which scared me when I was little.
The Forest of No Return


No comments:
Post a Comment