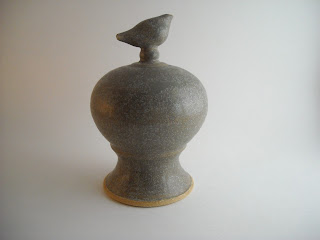
I've been wondering how to take the professional-looking photos like I see of some people's pottery. Recently, I read about how to make a lightbox to achieve the effect I'm looking for. You cut the top, left, right and front sides out of a sturdy box. I know what you're thinking- what's left? But you leave only the edges for support like a frame, then cover sides and top with interfacing. The interfacing lets the light through, but cuts down on the glare- a problem with photographing pottery. And lighting from different angles reduces shadows. These are my first attempts from last night. I definitely need to tweak before I get the results I'm looking for. This finial is from a firing I did Saturday. The glaze, by the way, is new. I don't think these photos do a great job showing the color. It is a nice stony matte- some taupe gray with blue-green flecks and a little warm tan of the clay body showing through.
This view, on white poster board background, still shows glare. One problem is the left light is not a daylight bulb so I have a yellow tint on that side and right side light was higher wattage.
Here is the set-up. I taped one layer of interfacing on sides and top, then draped some more over box when I found one layer wasn't enough. The posterboard is attached near top back of box with a couple of tacks. Used my son's old computer desk to set this on so it would be at a comfortable height to photograph.
This picture is lit from the top only. I used black posterboard this time. I didn't like most of the photos with this background. I guess this sound strange, but the black posterboard looked too much like posterboard.
Another on black background lit from top. Yep, a lot of figuring out to do yet.


No comments:
Post a Comment