Showing posts with label honey jars. Show all posts

Thursday, December 20, 2018

a little walk

I have put the clay away this past week, trying to get ready for Christmas.  I did wire a few things together (some fish and driftwood ornaments/wall hangings) last Saturday at the market- sorry, did not take pictures.  Still have a few mugs, a couple of berry bowls, one bluebird ornament, honey pots, vases, planters (mostly for small succulents), wall hangings and a few wall pockets and other items at the market for this Saturday.  When they are not there right in front of me it's hard to name them all.

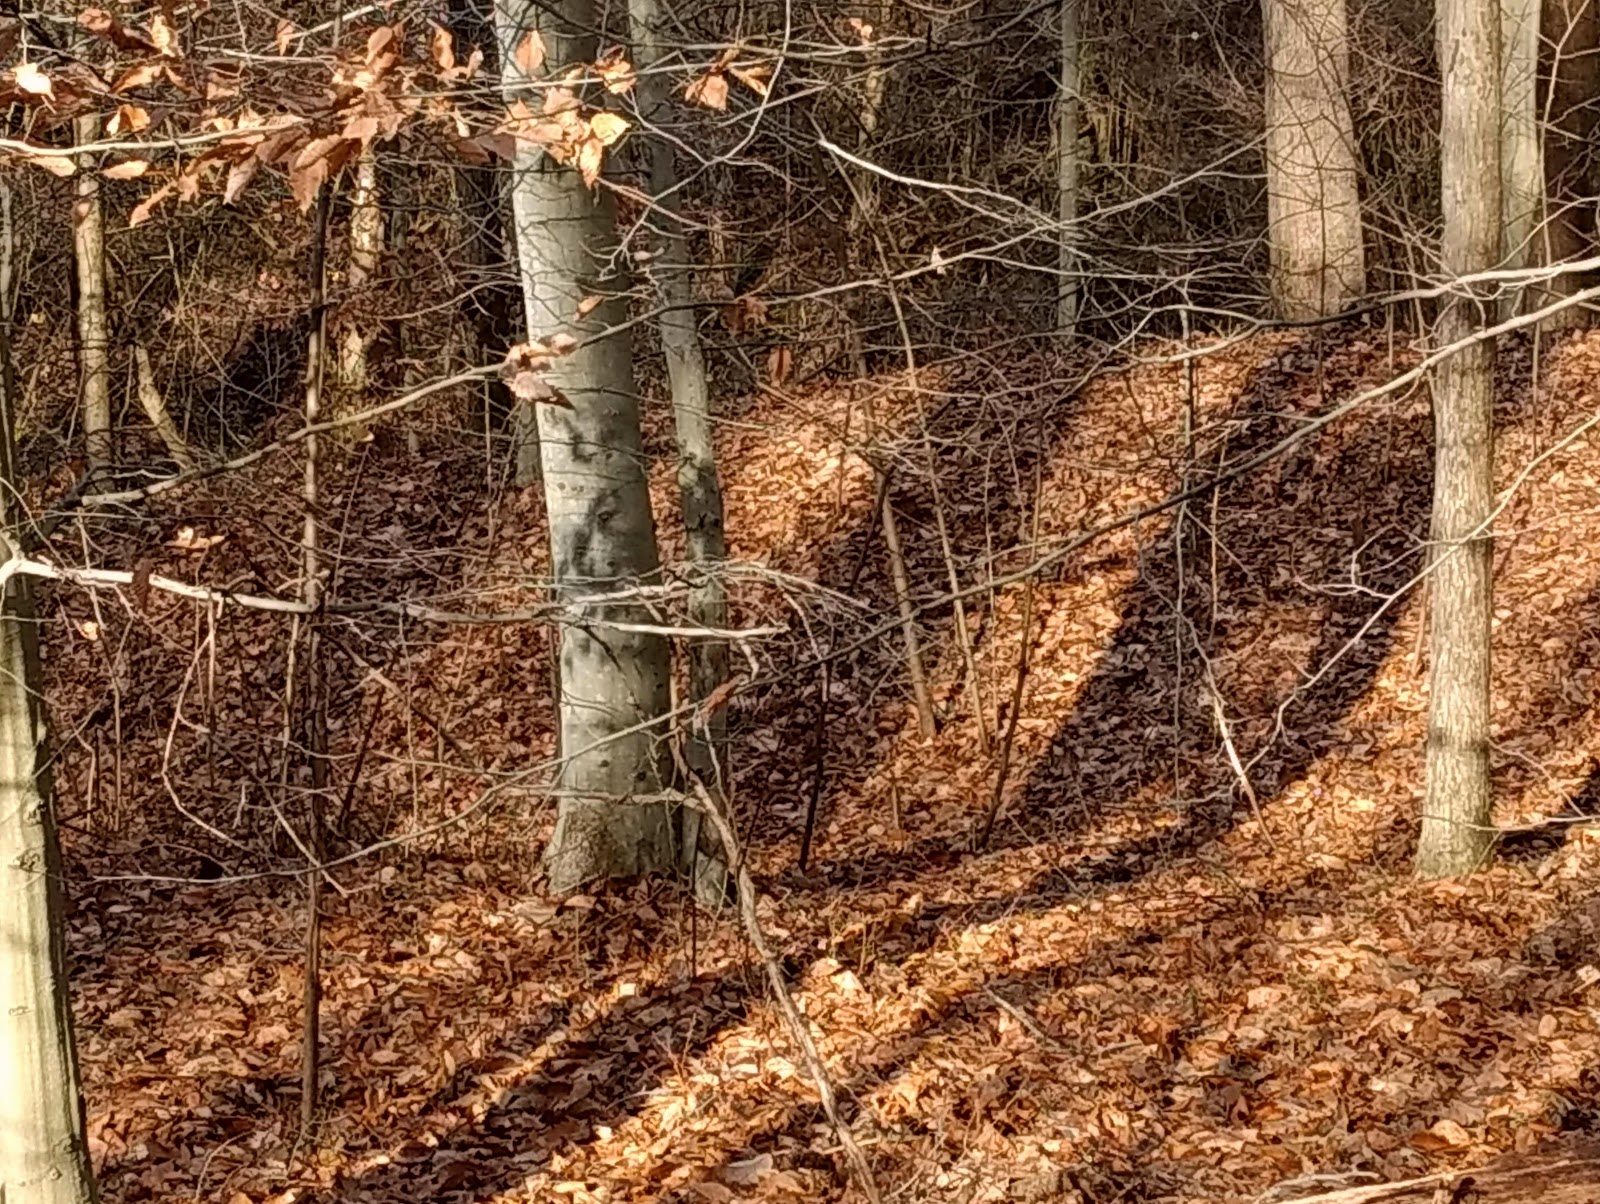
This morning, I headed to the woods for a walk.  Here were a few of the sights along the way. Click on the pics to enlarge.


No snow, but a little ice.


 I often see holly trees in the woods.  I don't know if they are indigenous in this area or if  the birds gifted the woods from plants people have purchased.  Below: some succulents at the base of a tree.  This is the only place I have noticed succulents growing in the woods.


Merry Christmas!

Friday, March 17, 2017

Empty Bowls 2017 and some honey jars

Empty Bowls is coming up soon.  Here's a few of the bowls I will bring to the event, scheduled for
Saturday, April 1 at 11 AM - 1 PM at  
First Presbyterian Church, Marietta, Ohio
501 4th St, Marietta, Ohio

 The above bowls are more of a cup-of-soup size while the handled bowls below are larger and come with cracker plates.

 I had to show a closer look of this glaze combo. This is a Tenmoku Gold with Blue Hare's Fur over it on the inside of bowl.  I don't know if this is going to be a consistent result or if I just got lucky.  First try was with just the tenmoku but I got too much gold, not enough dark contrast.  I re-glazed over the inside with the Blue Hare's Fur and fired again. Click on the pic for a closer view.

 The rims on this set have slightly different designs carved into them.  This is an off white glaze, and difficult to see, but there is a touch of green glaze just on the rims. The spots are from the clay, not the glaze.  I'm on the fence about this clay.  Thinking of seeing if the supplier will mix it 50/50 with a non-spotted clay. It depends what you're going for, I guess.  I would say it's a rustic look.

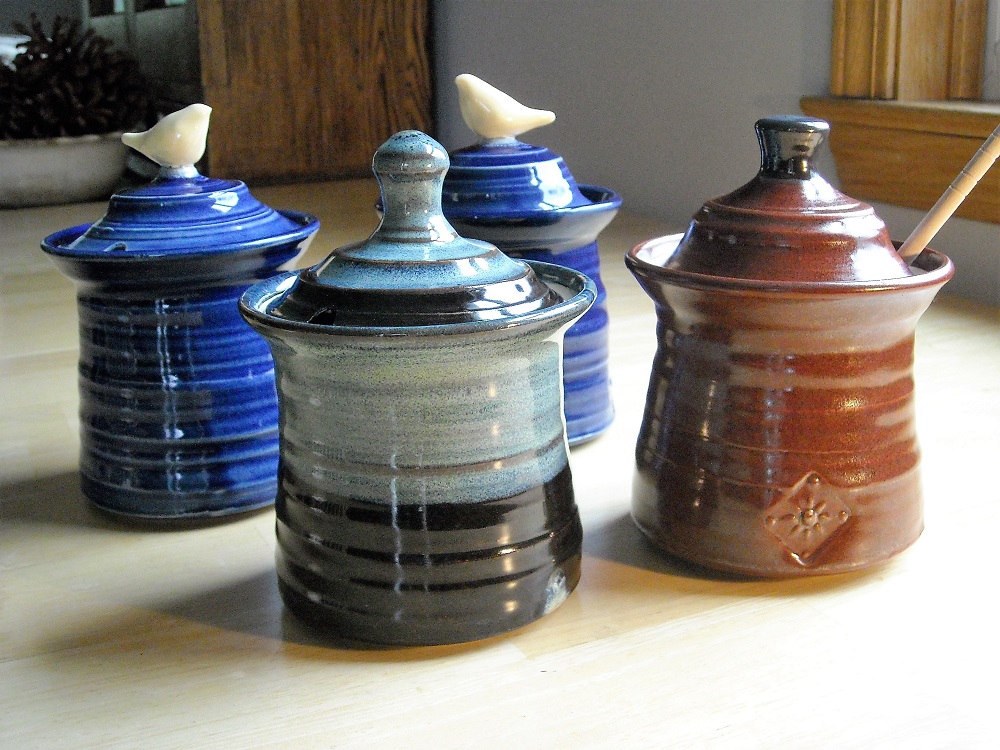
 The cobalt blue honey jars were made for a customer who requested that color.  At the time I had nothing with this glaze on it to show her. I said she was under no obligation to buy if it's not the color she expected. There is nothing personalized about the jars so I am perfectly fine with that.  I made two because those are two different clays and I wanted to see if the glaze worked better on one or the other.  Looks about the same to me.
A couple of other jars in robin's egg blue are getting decals fired on right now.

I like this glaze and once in a while I'll experiment to see how it behaves with other glazes. Thought I'd try the Blue Hare's fur dipped over top of the test tile.  Shiny brown with blue where it is thickest.  Promising. Not sure what this reddish glaze is really called as you will see if you check for the recipe here . Shiny brown with blue where thickest.  Promising.

Saturday, February 18, 2017

the sun makes an appearance

The sun is starting to make it's late afternoon appearance to my work table.  It takes a few months off in the winter.    

 Some greenware honey jars.  Customers awaiting.

An afternoon hike.  I was captivated by trees and sky reflected in a pond.

Sunday, August 2, 2015

honey jar

This is one of the jars from the last firing.  The glaze is called Tenmoku Gold.  Normally it is more brown than gold with the gold crystals (I'm calling them crystals but I don't know if that is correct term) standing out like little jewels suspended in the glaze.  The overabundance of crystals I seemed to achieve in this firing is not unattractive, but not what I was looking for. It's been awhile since I've used this glaze and suspect that the cool-down cycle I now use is slower than where I had it previously set.  It's possible that the iron oxide in this latest batch of glaze is from a different source than what I've used before, but I don't believe that would have caused the difference in the crystals.  I predict another add-on to the glaze bucket notations:  firing schedule.  Sometimes the changes I make are gradual and don't seem significant enough to make note of at the time.
One of the honey pots is at Riverside Artists Gallery and two more are at my booth at River City Farmer's Market in Marietta. 
Two more are set aside for a customer who requested this glaze, but since I still have a couple honey pots that didn't get in the last firing I'll probably fire with a faster cool-down schedule and see if the results are more like the mug below before showing them to her.
The glaze on this mug is from a firing I did a couple of years ago and is my preference.  As usual, click on pictures to enlarge. 

Tuesday, July 1, 2014

interrupting the flow

 Although I do not have the habits of a production potter, I find it works best to make a run of one type of pot at a time to get into the rhythm of that form, work out the bugs, and possibly discover ways to improve it..  But, I also know I have commissions to glaze and fire, not to mention  already having enough dry pots for a bisque firing.  Sometimes I don't know when to stop one thing and start the next. Or, in this case, I just don't want to but kind of have to.


I finished the lids for these last night.  Got them trimmed, then formed and attached the knobs. The knobs are a trap-  Once I started  "putting a bird on it" a lot of my customers expect all knobs to be birds.  It's true- birds sell pots!  It takes some extra time for me to form the birds compared to the time it takes to throw a knob on the wheel. I'll compromise with some birds and some regular knobs.  At this point, though, I need to interrupt the flow of honey pot making to get ready for a glaze firing.

Sunday, September 29, 2013

updates, etc.

Just did a glaze firing Thursday. I fired a couple of honey jars with the honey comb pattern- shown in the greenware state in this post. Sold one at the River City Farmer's Market yesterday and will probably take this one to the Riverside Artists Gallery tomorrow-

 Here's an update: Some time ago I talked about trying out drop frames and am finally following up on the results.  I had no problem with warping.  I dried the plates inside the frames until leather-hard, with the bottom sitting on a piece of drywall.  Once the plates were firm enough I sandwiched the frame between two pieces of drywall, flipped upside down, then removed the frame and flipped the plates back over (sandwiched again).  More careful drying, then bisque fired using a sprinkle of alumina hydrate on the shelves to help the plates move as they shrink a bit during the firing.  I don't know if I really needed to do that but was concerned about the expanse of flat bottoms on these plates.  I removed two of these plates from the kiln Friday- the smallest and largest.  The middle size didn't make this firing. I'm not so sure of my glaze and decoration choice- it's O.K. but now that I see it fired I can think of better choices.  Here's the small plate.  The largest  is at the bottom of a box I packed for the Farmer's market.

Another update:  Now that I understand the proper way to "soak" at the end of a firing I gave it a try.  As I mentioned
here, I had a crazing problem with a glaze I recently tried.  My results were better with the soaking, but not perfect.  Where there was crazing all through the glaze, now there are just a couple of small lines. I did a twenty minute soak.  I used a split shelf at the top, which meant my firing was very even.  Normally, with whole shelves, the bottom fires ahead of the top but as you can see, the cones from top and bottom are very similar:

What's selling- A little of everything at the market, but most popular were these Marietta tumblers:
People were buying for Christmas (already?), and some wanted something that said "Marietta, Ohio" without looking touristy.  I sold out of these at the market, but I believe I still have a few at the gallery.
 
And, I got the word from one the other artists at the gallery that my gingko planters have sold out. I will be making more. This is a picture of a couple of gingko planters I've made in the past:

Sunday, October 21, 2012

that conversation again

The frequent topic of frustration and sometimes bafflement- pricing.  I had an email conversation going on last week with a woman who makes and sells butter from an upstate New York dairy.  She was inquiring about getting hand crafted french butter crocks to sell with her butter rounds. Great idea, and I was flattered she tracked me down.  Course, I don't know, she might have sent the same email to a dozen other potters. So, I quoted her the price I sell these locally- $35.00, knowing it would be a little high for a bulk order, but I thought I'd give it a shot. Too high.  I came down to $30.00.  Silence.  Dead Air. In her response after my first quote, she suggested a simpler design for a lesser price.  My reply, along with the $30.00 offer, was the factor that dictated the price was the time spent fitting and measuring while throwing these.  If you are not familiar with a french butter crock, the part that holds the butter also functions as a lid.  So you have to fit a pot, which is also a lid, inside another pot.  A lot of stop and measure time.  Plus, basically, you are getting two pots in one.  Maybe it's just me.  If I made more of these maybe I'd be able to churn them out like a machine and instinctively know when I achieved the right height and width. Or, maybe I could be less fussy about the fit.  Not going to happen.
After a few days went by I emailed her again and suggested that a local potter might agree to make these at a cheaper price in exchange for the publicity plus there would be no added shipping cost.  I guess if someone lived within 30 or so miles of this dairy they could pick up a little business that way.  With me in southeast Ohio and her in upstate New York, I don't see that working out.
Freshly thrown french butter crock parts. Lid (left) holds butter.  Crock (right) holds water.

Once both parts dry to leather-hard they can be trimmed. 

Working on these honey jars too.  Same kind of lid as the french butter crocks, but a lot easier to fit.

Also threw a lot of knobs and some small nesting bowls.  The bowls are meant to be used as prep containers.  I'm looking forward to having fun with glazes on these.

Some mugs for a commission and more honey jars. Once pieces are well on their way to being dry and no longer need covering to make sure they dry evenly I take them out to the shelves by the kiln. 

Tuesday, August 21, 2012

glaze avoidance behavior

  • continue to make new work while a kiln load of fired bisqueware sits in the kiln for 3 days.
  • dorm room shopping for college bound son.
  • go for walks
  • look online for decent priced replacement for my worn Teva sandals
  • stop by friend's house for 15 minutes then stay for an hour and 15 minutes
  • miscellaneous
I don't mind glazing once I get started.  Although I prefer hands on clay work, glazing adds the surface creativity which can get pretty interesting.  Sometimes I delay glazing just because once I start I'm committed to it until I have a kiln load done.  I don't have the space to separate it from the clay process if I'd like to interrupt glazing and work with clay.
Yes, I've been absent from blogging for several weeks. I've had some commissions to take care of and haven't had time to start any new stuff that I really wanted to do. I had planned, by this time, to narrow down my glazes to a black, white and gray combo and an earthy off-white with some other colors thrown in as accents. At least this was the plan for functional ware.  Non-functional is another story. However, getting away from this smorgasbord of glazes I now have is not so easy.  Customers see them and ask for this or that in a certain glaze. So, making things for paying customers- good.  Not having time to make what I want- bad.

Just a couple of shots of stuff I've been doing:
I'd just about given up on french butter crocks but thought I'd give them another shot.  The lids often crack.  It might be a tiny surface crack, but doesn't matter how small it is when it ruins the piece.  I've paid special attention to compressing the clay at the bottom (actually top when you are looking at the picture) and making sure I clean up extra water, and played around with changing up how I throw them. I'm always careful about keeping the drying as even as possible. 
I wanted to see if it was worth my time to continue making these. So, I thought I'd just make a dozen  and keep track of how many crack while drying and how many crack while firing. I started throwing some crocks with my regular clay- not pictured here.  It is tan colored and slightly course textured.  Then I decided to switch to this lighter, smoother-textured clay because a couple of glazes I wanted to use works better with it.  The score so far is tan clay: made 7, 3 cracked while drying.  Light clay:  made 5, none cracked while drying.  I didn't get all of them in the last bisque firing, but so far none cracked while firing.  I'll have to see what happens when all are bisqued and glaze fired, but I can tell you that already losing 3 out of 7 is not acceptable.  That lighter clay might be a winner, though.

This honey jar is not a new shape for me, but one I would like to go back to. It reminds be a little of some grain storage buildings I've seen. I got sidetracked a while with trying to do cute- always a mistake.  The jars I was making with the little birds on top were beginning to annoy me.

Not sure about these vases yet.  Guess you could call them baskets but I only put the handles on for interest when the vase is empty. Pumpkins in background just got their stems glazed and waxed.

  Miss Billy grabs a corner of sunshine on the work table.

Sunday, May 13, 2012

ginkgo leaves

I'm down to the last of these planters and I just had a request to make a couple more of these with the ginkgo leaves impressed. Saturday I had another shopper looking for anything ginkgo for Mother's day at the market, too. 
Notice Billy, the cat, in the background to the right of the spray bottle.  She's keeping and eye on Red, who also wants to be on the work table. However, she considers two to be a crowd where Red is concerned.
I throw the bottoms of these planters on the wheel. When they dry to the leather-hard stage I add the slab collars. I toss these slabs at an angle onto a canvas covered board rather than roll them out, to get the organic look I want.  Normally I glaze these in gunmetal-see the planter on the left.  I'm thinking the weathered bronze green on this test tile might be good on these too.  If you're wondering why the ginkgo leaves are yellow when it is clearly spring, not fall, it's because they have been in my freezer.  Sometimes I stockpile a few leaves in the freezer to use in the winter months. I picked these up from under a neighbor's tree last fall.

 R--E--D just ate my last ginkgo leaf!  There is nothing subtle about this cat. Hope he doesn't throw up anywhere that involves upholstery.  Tomorrow I need to mail some honey pots and I know there's a ginkgo tree near the post office so I will re-supply.
 
Yesterday I bought these spoons from one of the other vendors at the farmer's market .  A couple of customers had asked if I had small wood spoons to use in my salt pigs and I noticed George Corbitt had some large mixing spoons out on his table along with the  wonderful boxes  he makes, so...

I'm very pleased with them and already sold two to customers who previously purchased my salt pigs.

Thursday, May 10, 2012

just be quiet

Sometimes you just have to drop something.  I was rushing to get glazing done so I'd get a firing in last week in anticipation of Mother's Day sales and to fulfill a couple of commissions while painting the living room and trying to figure out how I'd get ready for a show in June and where to find a good upholsterer for a busted chair, then dealing with the wreckage in the rest of the house that results from non-stop painting and glazing. Was that an impressive run-on sentence, or what?  A few days ago I made the decision to drop the show and immediately started sleeping better.  All that head noise just went away.  This show will be outdoors.  So far, I've dodged the outdoor shows and I wasn't looking forward to having to buy a canopy tent, having to set it up, and having to store it.  And what if it rains?  So what if you have a tent- who's going to show up?

Enough ranting. The berry bowls are here!
 I didn't get all of them fired because of the commission work I wanted to get in the kiln, so there will be more coming.

More knobs for the driftwood hangers (previous post) and a couple of new cookie presses.  There will be a special breakfast at the farmer's market for our customers this Sat. so I may try out the new cookie presses in time for it.  I know, cookies for breakfast. Bad.  But you can come by and get a berry bowl for those healthy strawberries you'll be buying at the market.

 This is what I use to make the holes in the berry bowls and the knobs.  The screw is just for size reference.  The brass tubing (I'm not sure that's what it's called) is from the hardware store.  I cut it at an angle and sharpened/beveled the angled end a little.  My son gave me some accessories for my Dremmel tool last Christmas that were just right for this little job.  The only thing it needs is a dowel rod stuck in the other end to make it more comfortable to hold. 

 Pleased with the way the glaze worked on this hanging.  Chartreuse with gunmetal around the edge. 


Here's a neat little benefit from having an Etsy shop I wasn't expecting- I was contacted about selling some honey jars wholesale to The Decorative Arts Center of Ohio.  It seems the buyer was looking for made-in-Ohio honey jars to go with some honey they are selling in the museum shop.  I've never been there, but now that I know it exists I'll have to check it out if I'm in the area. 

Blog Archive